
.png
)

Anytime someone says “I just love getting a mani and a pedi” I literally cringe. I despise visiting the nail salon. It’s the most miserable place to me for a few reasons. One, it’s the biggest waste of money to pay to get your nails painted.
And two, a pedicure is serious torture in my opinion. I can’t stand when they push your cuticles back, or when they use that damn cheese grater on your heels. Sure my feet look and feel great after, but the process to get there is pure misery to me.
If I do go to a nail salon it’s maybe a handful of times a year to get a good pedicure, so that I don’t have to ever go back. Instead, I paint my own nails at home and do it nearly every week. In order to get a salon-worthy manicure and pedicure, I rely on a few simple tools and tricks.
Today I’m sharing them with you so you can join the at-home mani club. It’s become one of my favorite lazy day rituals. Plus, I feel weird if my nails aren’t painted. So this process happens often as soon as my nails begin to chip.
Must Have Tools For An At Home Manicure
1. Buffer & Nail File

I can’t imagine life without my nail buffer. It’s my favorite way to file my nails down when they just need to be cleaned up a bit after clipping them. If I need to really shape them, I sometimes use a real ebony file, but honestly, this thing is the best. Plus, I like to buff my nails a tad, I find that it gives you a bit of a better surface to paint your nails on and the polish stays on longer.
2. Wooden Tool
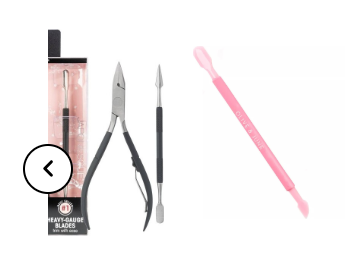
When doing my toenails at home, this tool is key for cleaning up your toes for an at home pedicure. Under the nails, around the cuticle, it’s the best. It’s also great for cleaning up your cuticles/skin when you paint your nails and it gets a little messy.
Receive Free Sneaker Sample
Free Delivery
3. Good Polishes

Having a few good polishes on hand to rotate through makes your at home manicure feel like you’re really at the salon. A few favorite brands of mine include essie for their seasonal colors and Sally Hansen. I also love having a few fun colors on hand like bright blues, whites and classic reds.
4. Base Coat

The nail system I like to use these days is Dazzle Dry. I find this lasts the longest. Start with their base coat. If you have any nail issues, swap this out for a base coat that is treating an issue you may have like peeling nails, ridges and so on.
5. Top Coat

As with my base coat, my top coat is also Dazzle Dry. I have a few others I do like but this one has been proven to make my manicure last up to two weeks!
A Step By Step Guide To The Perfect At Home Manicure
Step 1 – Trim & File
First, you’ll want to trim your nails down to the exact length you’d like them. If mine are getting long, I use a nail clipper and then finish with a nail file. You can also clean up any dirt with the wooden tool from under your nails. I personally leave my cuticles as is because I don’t think it’s really necessary to push them back.
Step 2 – Buff
I always buff my nails with the softer side of my nail buffer. I think this helps to prep the nails the best so that your polish stays on longer. It also helps to get out any irregular edges. My nails tend to split at the end, so this helps to even them out and keep my polish from cracking once it’s applied.
Step 3 – Prep The Nail
Now that you’ve filed and buffed your nails, we want to prep the nail itself for any polish. It’s best to do this with your acetone or non-acetone nail polish remover. This step helps to remove any dust from buffing, and any oil in your nails. When you do this your next steps of base coat and polish will stick better for a longer lasting at home manicure.
Step 4 – Base Coat
A base coat could be one of two types of products. I use Dazzle Dry base coat and apply two coats. If you have brittle, unhealthy nails, you may want to try a nourishing base coat to create a barrier between your nails and the polish. Target any issues your nails are dealing with in your base coat here. If you have no issues, just use the Dazzle Dry.
Step 5 – Apply Nail Polish
Your nail polish coats should not be thick, period. This is the biggest take away from painting your nails at home. It also helps to make sure they dry faster too. I always do two coats and allow them to dry just a tad in between. I polish from the middle and then work my way outwards.
This step just takes time to get good at. The more you do it, the better you’ll be at it. If you’re using Dazzle Dry base and top coat, you can use whatever nail polish color you want, it doesn’t have to be Dazzle Dry!
Step 6 – Top Coat
Apply your top coat, I use the Dazzle Dry top coat because it dries SO incredibly fast. Apply one or two coats of top coat.
Social Plugin